Who does not like beef sticks? They are tasty, packed with protein, and can last quite a while if preserved properly. However, it seems like every year they get more and more expensive to buy at the grocery store and not everyone knows how to make them at home.
It is common for us to spend almost $10 on this quick snack these days. If you learn how to make it at home, it can save you hundreds of dollars.
In this article we will demystify the process of how to make beef sticks at home that your family will love by showing you a quick and easy recipe.
Considerations
When you decide to make this snack at home, there are a few factors and methods to consider, based on your needs and preferences.
Smoker vs The Oven

I always enjoy the flavor of smoke on any meat that I prepare.
However, using or buying a smoker to cook meat can be a bit of challenge and you have to know how to properly do it.
The same thing may happen if you decide to smoke beef sticks. It can turn out to be a little challenge for you and you have to know how to properly do it.
The main secret for smoking this snack is that when we apply a low level of heat to this meat, the purpose is to dry it and not to cook it. This requires a consistent temperature below 200°F.
The issue is that with many smokers, it is difficult to keep your temperature below that level.
If you are confident in your smoking abilities, keep a careful watch on the temperature. If the fire gets too hot, you will have to remove the meat until it cools down.
The oven gives us the most control over temperature, so this is how I normally suggest preparing beef sticks at home.
However, feel free to try the smoker method at the same temperature and cooking time listed below, if you are confident enough on your smoking skills.
Different Types
Another thing to consider is to decide what kind is your favorite and which one you want to cook.
There are a lot of different tastes and methods to this snack out there. However, I have decided to tell you only the most used recipes and the ones I think are the most delicious.
Homemade Beef Sticks Recipes
Down below, you can find two of my favorite recipes I always do for my family. The first one is for naked homemade beef sticks and the second one is for casing beef sticks.
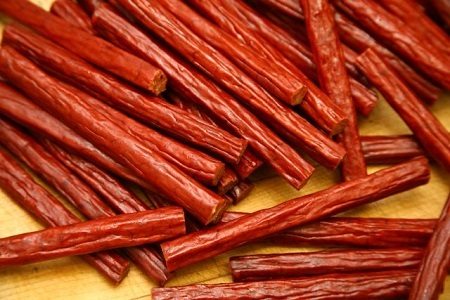
Naked Beef Sticks Recipe

In order to make this recipe, you will need a few ingredients.
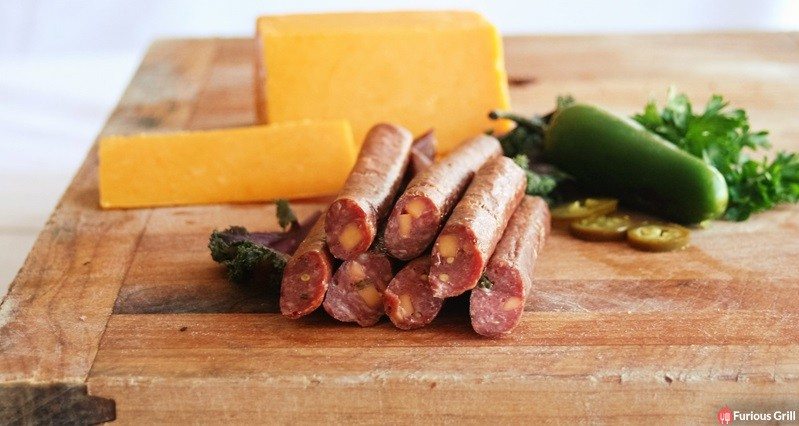
Also, please have in mind that these recipes do not have any cheese or jalapenos inside and do not have a casing. For sticks with cheese or jalapenos, you really need to have a casing, which is the second recipe found in the next section of this article.
Ingredients for Naked Beef Sticks
- 5 lbs. Ground Beef – Go for meat with a high fat content so the meat does not dry out completely while cooking
- 2 ½ Tsp. Mustard Seed
- 2 ½ Tsp. Coarse Black Pepper
- 2 ½ Tsp. Garlic Salt
- 1 Tsp. Hickory Smoked Salt
- 5 Tsp. Meat Curing Product (Must contain salt and sugar)
Note: There are variations to this recipe, so feel free to try something new. If you like spicy foods and want to go for a spicy cook, you can add some cumin, cayenne, and crushed red pepper to the mix. If you want a fattier flavor profile, add some pork sausage. Just be creative and add some extra ingredients based on your preferences.
How to Make Naked Beef Sticks at Home
Step 1) Mix all of your ingredients thoroughly in a large bowl. Make sure your spices are mixed before applying to the meat. This ensures that you do not get pockets of strong spices inside your finalized cook.
Step 2) Cover your bowl with plastic wrap and let it set in the refrigerator overnight. This lets the meat absorb the flavors of your spices.
Step 3) Take the bowl out of the fridge the next day and uncover your bowl. Mix the meat again. If you want to make something delicious, you need an even and thorough distribution throughout the meat.
Step 4) Cover the bowl again and let it set in the refrigerator overnight once more.
Step 5) The next day, take the bowl out of the fridge and line a baking sheet with parchment paper and form your meat into logs.
You want them to be about eight inches long and two inches in diameter. Space these on the baking sheet at least two inches apart.
Step 6) After you properly formed them on the baking sheet, start baking at 150°F for eight hours.
If you want the best possible results, turn the formed beef sticks every two hours.
That's it! The naked beef sticks are ready. You can now let them cool and store these in the refrigerator for two weeks or in the freezer for six weeks.
Casing Beef Sticks Recipe
For this recipe, you will need a meat gun such as the Jerky Cannon to help you fill your casings.
Ingredients for Casing Beef Sticks
- 5 lbs. Ground Beef (Preferably with a high fat content)
- 3 Whole Jalapenos
- 12 Oz. of Shredded Cheddar Cheese
- Collagen Casings
- 2 ½ Tsp. Mustard Seed
- 2 ½ Tsp. Coarse Black Pepper
- 2 ½ Tsp. Garlic Salt
- 1 Tsp. Hickory Smoked Salt
- 5 Tsp. Meat Curing Product (Must contain salt and sugar)
How to Make Casing Beef Sticks at Home

Casing Beef Sticks
Step 1) Mix the meat and the spices in a large bowl.
Step 2) Take the jalapenos and chop them. If you like spicy foods, leave in the seeds and interior membrane. For mild finalized cook, trim it out. After you finish chopping, mix them into your meat.
Step 3) Flatten out your meat and then add your shredded cheddar cheese.
Start mixing it gently but be careful to not get too aggressive as you do not want your cheese to turn into mush.
Also, you must be careful about leaving this meat in the refrigerator overnight because the spice level can intensify or fade. So, you are good to go ahead and prepare the beef sticks right after you finish mixing them.
Step 4) Start forming your meat into logs and prepare out your meat gun. Feed your collagen casing onto the spout. Fill your gun with meat and start to pump it out through the spout. Squeeze out any air and tie the end of the casing. Then slowly fill it all the way, being careful to avoid any air bubbles. Fill the whole casing and tie the other end. Repeat this process for all your meat.
Step 5) Start your oven at 150°F and let it preheat.
If you have properly sealed your casings, you can put the beef sticks directly on the center rack and let it cook for 8 hours.
Step 6) After 8 hours of cooking, remove them from the oven and let them cool.
Step 7) Cut the beef sticks to a convenient length and store in the refrigerator for two weeks or in the freezer for six weeks.
That's how to make casing beef sticks at home.
Final Thoughts
Smoked Beef Sticks
Making your own beef sticks can be a fun project with which to get your family involved. It easy, fun and you will end up with a delicious snack sticks.
I know that the two recipes included on this article are almost the same but there are a few different ingredients which are added to the second one and they will taste different totally different.
If you like venison meat, then you can try to substitute venison for beef and use up some of your freezer meat if desired. Just be sure you add plenty of pork or beef fat to the meat.
This project can help you fill your freezer with a delicious snack, and can actually save you some of your money at the grocery store.
Hopefully you will have as much fun learning how to make beef sticks as our family did. It can be an enjoyable cooking experience for years to come.


Thanks for this! I’ve been looking for a recipe for meat sticks without all the fillers that are in commercial brands. I have a few questions though. I have Bolner’s Fiesta brand curing salt, which seems to be mostly just sodium nitrate, it reccomends using 1 teaspoon per 5 pounds of meat, would using this plus adding a few teaspoons of sugar create the same result? Also my electric oven only starts at 200 degrees (below that is WARM) would cooking the sticks at 200 degrees make a huge difference? And I also don’t have parchment paper at home and was planning on lining the baking sheets with aluminum foil, hoping that won’t negatively affect the end result.
Hello Jessica,
I am glad you liked the article.
As for your questions: a) You are free to use any curing salt brands, with or without sugar. It depends on your preferences and what you want your beef sticks to taste like.
b) If you cook at 200°F, the cooking time will be much faster and you have to regularly check and turn the beef sticks to make sure they don’t get cooked only on one side.
c) If you use aluminum foil, it will not affect the end result. Just make sure that you turn the beef sticks regularly because the aluminum foil will cook the down side a bit faster.
If you have any other question, feel free to ask me.
Cheers,
Kendrick.
Do you have to use salt/cure? Have a relative that’s sensitive to nitrates. If we keep the end product refrigerated are we ok?
Hello Dana,
It totally depends on your taste and what you think is best.
I personally go for a 70/30 fat content mixture. I think that’s the right spot for the best results.
I hope this helps,
Best Regards,
Kendrick
Hi, I found that the mixture was much too dry for it to work in my Lem stuffer with the casings. I needed to add almost 3 cups of ice cold water to prevent it from blowing out around the gasket and blowing out of the side of the casings due to the small horn required. I used high temp cheddar cheese too, it holds its shape much better. The added water took longer to evaporate, but the results were very good.
Thank you for sharing.
John
The lowest temperature setting on my oven is 200 degrees. What do you suggest I do?
Hello Gary,
In your case, I would recommend to continuously monitor the temperature and if it gets too hot, (there is a high possibility that it will get too hot if the 200° is the lowest setting), you have to remove the meat out of the oven until it cools down a little bit.
I think this is the best thing you can do.
Let me know how it goes,
– Kendrick
where do I get casings??? and can I use a sausage maker???
Hello Rich J.
You can find Sausage casings on several stores or even online on Amazon. Just search for sausage casings and they should come up. As for sausage maker, yes you can use it.
Hope this helps,
Cheers Kendrick.
Thank you. I will keep close watch and do what you have suggested.
200 deg will work fine but be sure to pull and ice bathe at 152. much higher and the cheese and fat will run to the casing
Hello Anne,
Actually, to be honest, I have never tried it on a food dehydrator. You can do a small test by only cooking a small portion of the meat on a food dehydrator and if it turns out good, you can cook the rest.
As for the smoked salt substituting, I think there would be no problem at all. It all depends on your taste.
Thanks for visiting my site 🙂
I want to try this without casings. Will the log fall apart without a casing? Sorry if that’s a stupid question!
Hello Pamela,
Well I think that the heat will make the log fall apart without having casings. Or even if it doesn’t fall apart, I think will become kind-of flat surface due to heat, maybe something like a long cookie.
However, if you want, you can give it a try.
Good Luck!
do you have a smaller receipe than 5 lbs.?
Hello Jim,
I usually prepare 5 lb. since beef sticks are easy to store and can last for a long time. But, if you want to make less than 5 lb. you can try and cut in half every ingredient mention on the list and prepare 2.5 lb. of ground beef instead.
I hope it helps,
Cheers, Kendrick
I’m sorry if I missed this in the article, but, what size casings?
Hello Kevin,
Thanks for pointing out since I forgot to mention in the article. I personally use 17 mm casings but if you prefer, you can also use 19 mm casings.
Hope it helps,
Cheers, Kendrick.
This sounds good. I do summer sausage in my smoker. As for the casings, do you use natural or callagen? Thanks.
Hello Dennis,
I use collagen casings but both options will work great.
Cheers,
Kendrick.
I use my dehydrator to do my sticks in it runs up to 155 degrees. I never use sugar in them as it changes the flavor of the meat I love plane meat taste. I don’t always use casings for my self how ever I do when I make the to give to my kids. Be cause they don’t brake as easy when they transport them home. I really think you do a great job teaching people how to make these it is nice of you do so.
Hello Ann,
Yes, the ingredients are for Teaspoons. As for bison, I have never tried using it but I think the process would be the same, based on several articles I have read online.
Let me know how it goes,
Cheers, Kendrick
Could you do a mixture of 3 Lbs. of ground beef and 2 Lbs of ground sausage? Thanks
Hello Jay,
Yes, you can try a mixture of 3 Lbs of ground beef and 2 Lbs of ground sausage. I haven’t personally tried it but I think there shouldn’t be any issue with that.
Let me know how it goes,
Cheers Kendrick
To make very small diameter no casing sticks would I just decrease the cook time? I want to use them both for snacks and caesar stir sticks. Your recipe said about 2 inch logs. How much do they reduce in size when done?
There is no exact answer on how much they will decrease on size but they will shrink probably up to 0.5 inch when compared to uncooked logs. The reduction in size also depends on the meat mixture. If there is more fat-to-meat ratio on the mixture, the logs will actually reduce more in size as the fat melts.
I used my dehydrator……and a regular funnel. I put my meat thru the funnel with the help of a round bottle. Pressing the bottom of the bottle….I ran the meat through and without no casing. It took 6 hours and I never lost the roundness of the stick.
Yeah it was the primitive way….but I think they were fine….all gone. (2 lbs)